

- Open Adobe Reader DC.
- In the top menu bar, select Edit > Preferences.
- Disable ‘Enable protected mode on startup’ (this parameter should be without a ‘tick’).
- Confirm the operation by clicking ‘Yes’.
- Close Adobe Reader DC and start it again.

Adding a graphical representation of your signature
Add a photo of your handwritten signature to your documents and be more professional
- Adobe Reader DC
- In the top menu bar, select Edit > Preferences.
- A new window opens. Click ‘Signatures’ on the left, then Electronic signatures’ on the right, ‘Creation and style’ and ‘More’.
- A new window opens. At the bottom, in ‘Styles’, click ‘New’.
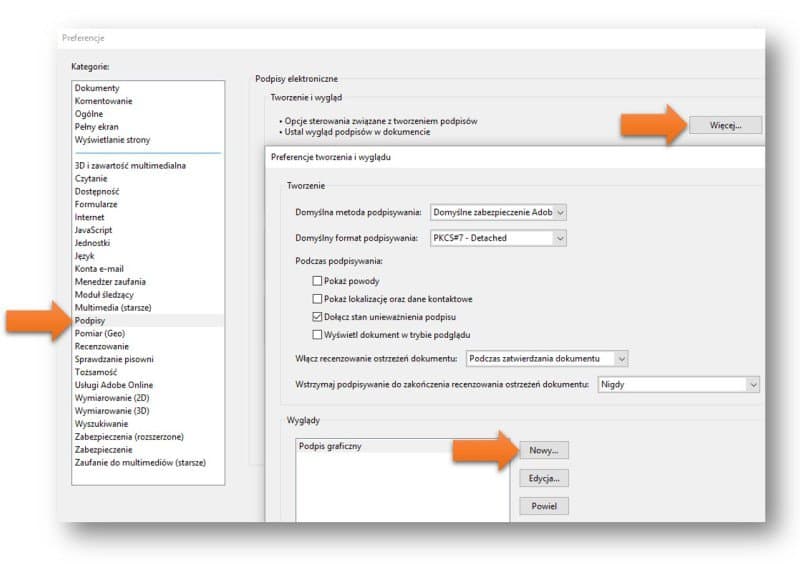
- A new window opens. At the top, in the ‘Title’ field, enter the name of your graphic signature. Below, in ‘Configure the graphics’, select ‘Import graphics’ and click the button to the right – ‘File’.
- A new window opens. Click the ‘View’ button. Find and click your graphic signature in PDF format. Click ‘Open’ > ‘OK’.
- Your graphic signature appears at the top, in the ‘Preview’ window, with the information on the right.
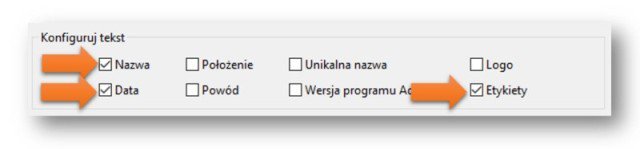
- Below, in ‘Configure the text’, select ‘Name’, ‘Date’ and ‘Labels’. Disable the other options. Click ‘OK’ > ‘OK’.
You have just set up your graphic signature. Still, you can have plenty of them! Here, you can create, edit and delete the graphical versions of your signatures at any time.
Document signing
Signing a document with a graphical representation of your handwritten signature
- On the menu bar, select ‘File’ > ‘Open’
- Find the PDF document you want to sign. Select it and click ‘Open’.
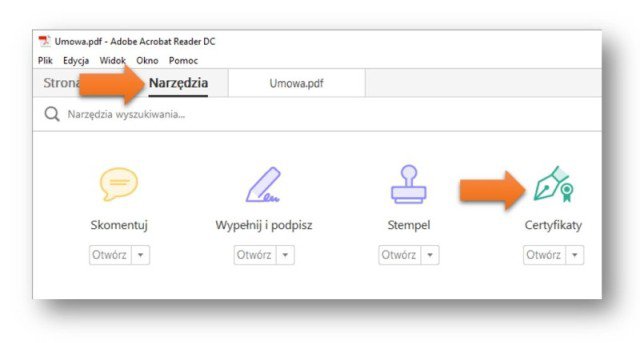
- Select ‘Tools’> ‘Certificates’ > ‘Sign with digital signature’. A dialogue box with instructions to select a draw in the document will be displayed. Click ‘OK’ and draw a rectangle where you want the signature to appear.
- A new window opens. At the top, in ‘Sign as’, select your e-signature (with your first and last name, and CERTUM QCA inscription).
- Below, in ‘Style’, select ‘Graphical signature’ or ‘Default text’. Select ‘Block document after signing’ if you are the only or the last person to sign this document. Click ‘Signature’.
- Enter the name of the file you want to assign to the signed document. Click ‘Save’.
- A dialogue box opens; enter your e-signature PIN here. Click ‘OK’.
The PDF document has just been given legal effect. The legal consequences of an electronic signature are the same as of a handwritten signature (the Act of 18.09.2001).
In addition, the file was saved under a different name than the original document. Thus, there are two documents: an e-signed document and a file without a signature.
In addition, the file was saved under a different name than the original document. Thus, there are two documents: an e-signed document and a file without a signature.